That Little Wooden “Mushroom” in Grandma’s Sewing Tin? It Wasn’t Decorative at All

I love finding old sewing tins. Not the perfectly curated antique-shop ones either—the real ones. The slightly rusty cookie tins stuffed with tangled thread, loose buttons, bent safety pins, and those mystery objects nobody in the family can identify anymore.

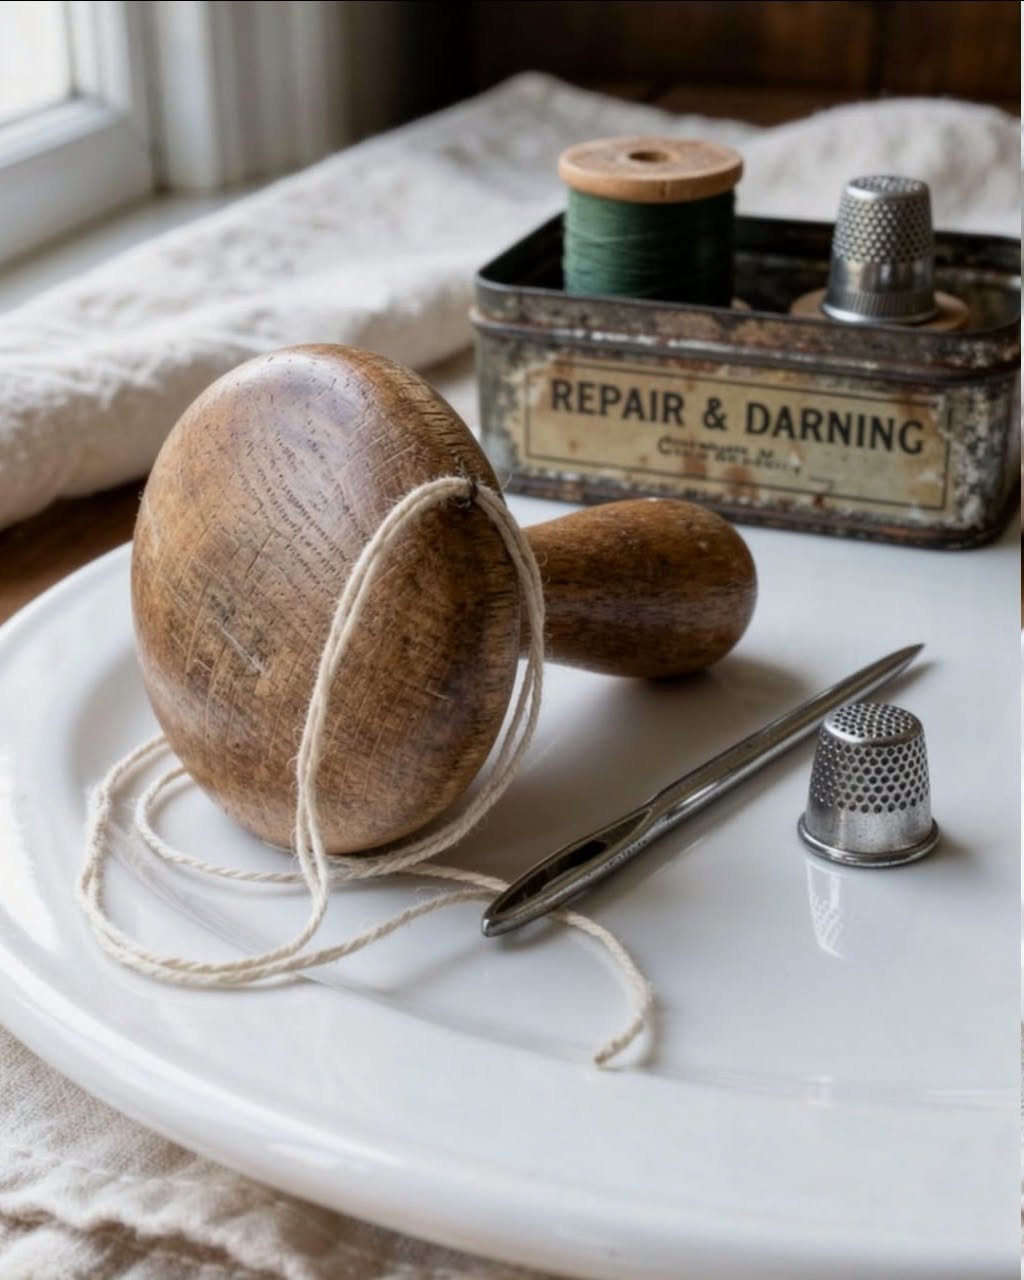
And every now and then, tucked between the needles and faded measuring tape, there’s this odd little wooden thing.

Smooth. Rounded. Kind of mushroom-shaped.

At first glance, it looks like it should belong in a kitchen drawer, not a sewing kit. Some people guess it’s a tiny pestle. Others think it’s decorative. My uncle once thought it was for cracking walnuts, which… honestly made me laugh harder than it should have.

But it turns out this little object had a very practical job. A job most people under 40 have probably never even seen done in real life.

It’s called a darning mushroom.

And once you know what it is, you start seeing an entire lost world behind it.

The Shape Is Weird Until You Realize What It Was Made For
The first clue is the size.

A real pestle would usually have a longer handle and a heavier feel to it. This thing doesn’t. The handle is short, almost stubby, and the rounded top is unusually smooth—like it was meant to protect fabric rather than crush anything.

That smoothness matters.

You can tell it was handled constantly over the years too. Old wooden tools develop this soft shine that only comes from decades of human hands touching them. It’s hard to fake. Kind of comforting, actually.

And once you notice it came from a sewing tin, the mystery starts to unravel pretty quickly.

Before Cheap Socks, People Repaired Things
That’s the part modern life erased a little.

Today, if a sock gets a hole in it, most people toss it. Maybe not immediately—we all have that “around the house” sock phase—but eventually it’s gone.

A hundred years ago? Different story.

Clothing cost more relative to income, and people simply didn’t waste fabric if it could still be saved. So instead of throwing socks away, they repaired them. Over and over sometimes.

That’s where the darning mushroom came in.

You’d stretch the damaged sock over the rounded wooden cap so the fabric stayed firm and stable while you stitched the hole closed. The mushroom basically acted like a tiny stand-in for a foot.

Simple idea. Brilliant design.

Honestly, It’s Kind of Ingenious
The rounded top wasn’t just for appearance.

It let the fabric stretch naturally without pulling too tight. That made weaving new thread into the damaged area much easier. If the surface had rough edges, it would snag delicate fibers, especially on thinner stockings.

And the handle? Just enough grip to hold steady while sewing.

That’s it. No moving parts. No gimmicks. Just a really well-thought-out little tool.

A lot of them were made from hardwoods like maple or beech because they could withstand years—sometimes generations—of use without cracking.

Some were plain. Others had painted tops or carved details. You occasionally find really charming ones with floral patterns or chipped red paint still hanging on after decades.

Those are my favorite, honestly. They feel lived in.

There Were “Darning Eggs” Too, Which Sounds Slightly Ridiculous
Not every darning tool looked like a mushroom.

Some looked exactly like wooden eggs. Same idea, slightly different shape. People often used the terms interchangeably depending on where they grew up.

And if you spend enough time looking through antique sewing collections, you’ll notice people got surprisingly creative with them.

Tiny decorative handles. Turned wood patterns. Painted finishes.

It’s funny—people used to add beauty to ordinary household objects in a way we don’t do much anymore. Even practical tools had personality.

Now everything comes in matte gray plastic and sadness.

The Actual Repair Process Took Patience
And skill, honestly.

NEXT PAGE
Read more

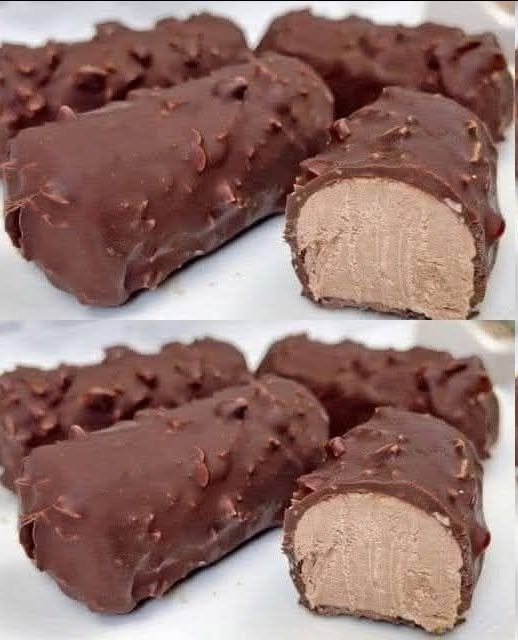
Frozen Chocolate Bars with Peanuts

Indulge in these decadent Frozen Chocolate Bars with Peanuts. This delightful treat combines the creaminess of cottage cheese or cream cheese with the richness of dark chocolate and the crunch of peanuts. Perfect for a summer dessert or a special treat, these frozen bars are easy to make and sure to satisfy any sweet tooth.

INGREDIENTS:


300 g (10.5 ounces) cottage cheese or cream cheese

40 g (3 tablespoons) coconut, cocoa, or classic butter

40 g (2 tablespoons) honey

1 tsp vanilla extract

20 g (2 tablespoons) cocoa powder

40 g (1/4 cup) peanuts

160 g (5.6 ounces) dark chocolate

40 g (3 tablespoons) olive oil


INSTRUCTIONS:


see continuation on next page

Read more

Wait… Those Lines on a Red Solo Cup Actually Mean Something?

Most of us have held a Solo Cup at some point—at a backyard cookout, a tailgate, a graduation party, maybe just standing around someone’s kitchen island talking long after dinner should’ve ended. It’s one of those objects that almost disappears because it’s so familiar. You grab one, fill it, set it down, forget which one is yours, grab another. Life happens.

But here’s a funny thought: what if one of the most recognizable party staples in America has been quietly hiding a clever little secret this whole time?

Turns out… it kind of has.

Those horizontal ridges wrapping around a red Solo cup? They aren’t just there to make the cup look nice—or to give your fingers something to grip while balancing a burger in your other hand. A lot of people believe those lines double as informal measuring guides. And honestly? Once you notice it, you can’t unsee it.

It’s one of those tiny design details that makes you stop and think, Wait… how did I never know this?

The Cup That Somehow Became a Cultural Celebrity

Not many disposable products become icons. Yet somehow the red Solo cup did.

The story starts with Leo Hulseman, who founded the Solo Cup Company in the 1930s. The company started with pretty humble products—paper cones for water coolers. Nothing glamorous.

Then came the plastic party cup.

By the 1970s, the red version started showing up everywhere. And I mean everywhere.

College parties? Obviously.

Neighborhood barbecues? Of course.

Fourth of July cookouts, block parties, tailgates, family reunions… somehow that bright red cup became part of the scenery.

And maybe that’s why people rarely question its design. It feels too ordinary to hide surprises.

But ordinary objects often do.

Those Lines Aren’t Random—Well, Not Entirely

Let me explain.

There’s a long-running belief—part practical joke, part useful party wisdom—that the ridges on a standard red Solo cup correspond loosely to drink portions:

  • Bottom line: roughly 1 ounce (a pour of spirits)
  • Middle line: around 5 ounces (a wine serving)
  • Upper line: about 12 ounces (beer or soda)

Convenient, right?

Almost suspiciously convenient.

Now, to be fair, these markings weren’t officially engineered as precise bartending measurements across all cup versions. Different cup models vary, and even Dart Container has indicated the ridges weren’t designed as certified measuring marks.

Still… people use them that way. And they work well enough that the myth stuck.

And honestly? Sometimes folklore hangs around because there’s truth hiding in it.

A Party Hack Hiding in Plain Sight

Think about a crowded party.

Nobody’s pulling out a measuring jigger.

Nobody’s saying, “Excuse me while I precisely portion this merlot.”

You eyeball it.

And these lines make eyeballing easier.

That’s clever design—even if partly accidental.

It reminds me of the little indent on a wine bottle punt. People argue about what it’s for all the time. Stability? Sediment? Fancy tradition? Sometimes a design feature does more than one thing.

Same idea here.

The cup quietly helps.

No fuss.

No instruction manual.

Just a little plastic nudge.

Honestly, It Can Help With Responsible Drinking

Read more

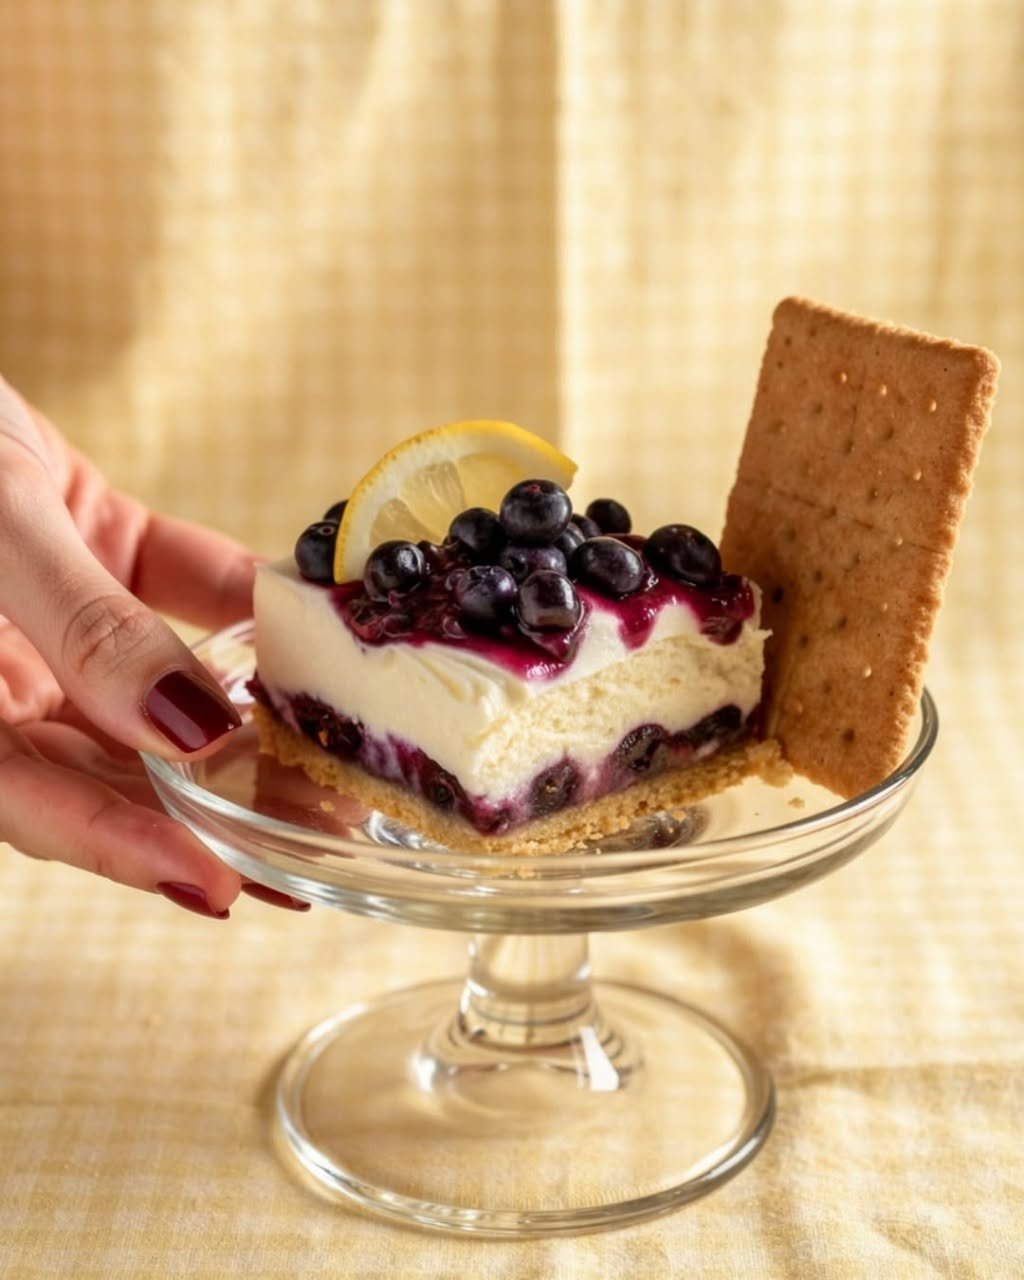
Lemon Blueberry Delight

This lemon blueberry dessert has a buttery graham cracker crust, a jammy blueberry layer, silky lemon filling, and a cloud of whipped cream on top. It’s easy to pull together, mostly make-ahead, and tastes like actual summer in every bite.

Why You’ll Love It
That layered flavor — tangy lemon, sweet jammy blueberries, and a buttery crust all in one bite
Almost entirely make-ahead — chill it overnight and just add whipped cream before serving
No fussy steps — the filling comes together with a whisk, and the blueberry layer takes five minutes on the stove
Looks impressive, isn’t hard — the kind of dessert people ask about quietly because they can’t believe it was this simple
Tastes better the next day — the flavors settle and get more cohesive after a night in the fridge

For Complete Cooking STEPS Please Head On Over To Next Page Or Open button (>) and don’t forget to SHARE with your Facebook friends

Read more

Rotel Dip Recipe

Rotel Dip Recipe
Ingredients
💛 Rotel Dip
1 pound lean ground beef 90/10 recommended
½ teaspoon salt
¼ teaspoon black pepper
16 ounces Velveeta cut into 1-inch cubes
10 ounce can Rotel diced tomatoes and green chillies undrained
💛 H

Instructions

Read more

Slow Cooker 3-Ingredient Beef Stew

Slow Cooker 3-Ingredient Beef Stew
1. Introduction
Slow Cooker 3-Ingredient Beef Stew is the epitome of effortless home cooking, designed for busy days when you need a hearty, soul-warming meal with minimal preparation. This streamlined version of the classic stew relies on a few high-impact ingredients to create a deep, savory gravy and tender, melt-in-your-mouth meat. By allowing the beef to simmer slowly, the connective tissues break down, naturally thickening the sauce and infusing the vegetables with rich, beefy flavor.Cookware & Diningware

2. Ingredients
The Meat: 2 lbs beef stew meat (typically chuck or round), cut into 1-inch cubes.

The Vegetables: 1 bag (approx. 24 oz) frozen stew vegetables (usually a mix of potatoes, carrots, celery, and onions).

The Flavor Base: 1 jar (12–16 oz) beef gravy or 1 packet of beef stew seasoning mixed with 1 cup of water.

NEXT PAGE

Read more

Doctors Reveal That Eating Cashews Causes Remarkable Changes in Your Body

They’re creamy, satisfying, and easy to snack on by the handful. But cashews aren’t just delicious—they’re a genuine nutritional powerhouse. When eaten regularly in the right portions, doctors and nutrition experts say cashews can spark meaningful changes in your heart, metabolism, brain, and overall health.

Here’s what actually happens to your body when you make cashews a regular part of your diet.

First, What’s in a Cashew?

One ounce of cashews (about 18 nuts, or a small handful) contains:

Nutrient Amount % Daily Value
Calories 160-170
Total fat 13g 20%
Protein 4-5g 9-10%
Carbohydrates 9-10g 3%
Fiber <1g 3%
Copper 0.6mg 67%
Magnesium 73mg 17%
Manganese 0.2mg 9%
Phosphorus 139mg 11%
Zinc 1.6mg 14%
Iron 1.7mg 9%
Vitamin K 9.8mcg 8%

Key takeaway: Cashews are particularly rich in copper (nearly 70% of your daily needs in one serving), magnesium, and healthy monounsaturated fats .

What Happens to Your Heart

1. Cholesterol Levels May Improve

Despite having slightly more saturated fat than almonds or pistachios, most of the fat in cashews is heart-healthy monounsaturated and polyunsaturated fats .

The research: A 2017 study found that people who ate cashews instead of potato chips had lower total and LDL (“bad”) cholesterol levels . A 2020 meta-analysis also suggested that cashew consumption may reduce triglycerides .

What doctors say: “Cashews can definitely be part of a heart-healthy nutrition pattern when eaten in the right portions,” says Grace A. Derocha, RD, a spokesperson for the Academy of Nutrition and Dietetics .

2. Blood Pressure May Drop

Cashews provide magnesium and potassium—two minerals that help keep blood vessels flexible and support healthy blood pressure .

The research: A 2020 meta-analysis concluded that cashew consumption reduced blood pressure . While the evidence is modest, it “skews positively,” according to Derocha .

3. Antioxidants Protect Your Arteries

Cashews contain abundant antioxidants that fight oxidative stress—a key factor in atherosclerosis (hardening of the arteries) that leads to heart disease .

What Happens to Your Metabolism


see continuation on next page

Read more

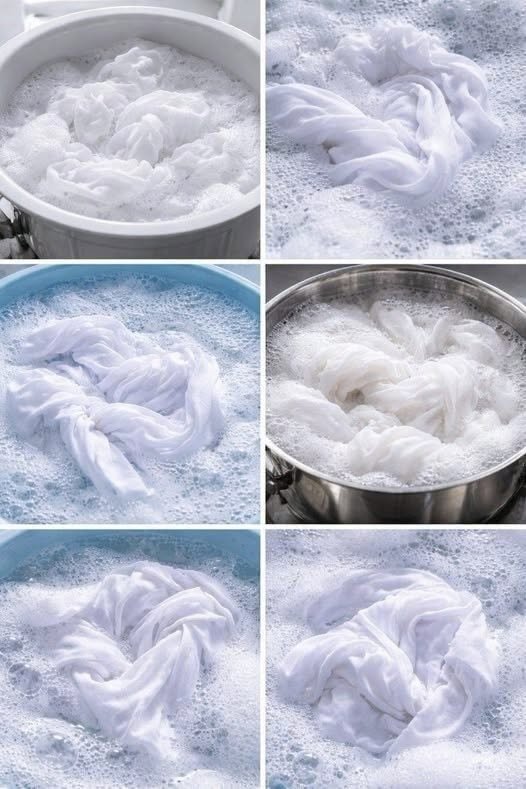
Laundry as white and pure as milk: you only need this ingredient

Getting pure white laundry is the satisfying result we all hope to see once the washing cycle finishes. While there are many products and ingredients you can use to brighten whites, one particular household item stands out for its remarkable effectiveness: aspirin.
There is nothing more challenging than keeping white clothes as bright as the day you bought them. If we want white shirts to look pristine and maintain their brilliance, we cannot simply toss them in the wash with the rest of the laundry. Instead, we need to spend a few extra minutes treating stains and using the right techniques to preserve that crisp, clean whiteness.

How to Protect and Brighten White Laundry

For a white shirt to recover its fresh appearance and maintain its brightness longer, a few simple tricks can make a significant difference. These methods work whether you wash by hand or use a washing machine, helping your whites look perfect wash after wash.
Before starting any wash, gather the equipment you need to treat stained clothes: a basin, laundry detergent, and your chosen whitening agent. Most importantly, always separate white clothes from colored items. Mixing whites with other colors is the fastest way to dull their brightness.

Separate Laundry by Color and Pre-Treat Stains

For Complete Cooking STEPS Please Head On Over To Next Page Or Open button (>) and don’t forget to SHARE with your Facebook friends

Read more

The Ancient Elixir

The Ancient Elixir: How This Garlic, Ginger, and Citrus Infusion Supports Head-to-Toe Wellness
In an era dominated by synthetic supplements and quick-fix health trends, more people than ever are turning their attention back to the earth. For centuries, traditional herbalism relied on the synergy of simple, whole ingredients to fortify the body’s natural defenses, soothe stubborn discomfort, and promote longevity. Today, one specific combination of kitchen staples has captured the internet’s attention: a potent infusion of fresh garlic, zesty ginger, vibrant lime, and fragrant mint.

Often discussed in wellness circles as a foundational tonic, this blend brings together some of the most biologically active plants available to us. But what is the real science behind these ingredients? How do they interact with our biology, and what is the best way to prepare this infusion at home to maximize its potential?

In this ultimate guide, we will separate myth from reality, explore the evidence-based benefits of each ingredient, and provide a foolproof, step-by-step recipe to help you integrate this vibrant tonic into your daily routine.

Separating Fact from Fiction: What This Infusion Can and Cannot Do
Before diving into the recipe, it is essential to address some of the dramatic claims circulating online regarding wellness waters and natural remedies. You may have seen graphics suggesting that a simple herbal drink can completely clear arterial plaque or reverse advanced cardiovascular issues in a matter of days.

The Reality of Cardiovascular Health
Arterial plaque is a complex substance composed of cholesterol, fatty deposits, cellular waste products, and calcium. Once it hardens within the arterial walls, it cannot be physically dissolved or “washed away” by consuming a specific beverage. Managing heart health requires a holistic approach, including a balanced diet, regular physical activity, stress management, and, when necessary, medical guidance.

The Power of Preventative Nutrition
While this tonic won’t clear plaque overnight, the ingredients within it are deeply valued in nutritional science for their preventative qualities. Packed with potent antioxidants, vasodilating compounds, and anti-inflammatory agents, regular consumption of these whole foods helps combat systemic oxidative stress. Think of this infusion not as a cure-all, but as a delicious, protective shield that supports your body’s natural metabolic and circulatory functions.

The Powerhouse Ingredients Behind the Blend
To understand why this infusion is so highly regarded, we have to look closely at the individual components. When combined, these ingredients create a synergistic effect, meaning their health-promoting properties enhance one another.

1. Garlic (Allium sativum): The Longevity Herb
Garlic is far more than a culinary base; it is one of the oldest cultivated medicinal plants in human history. The secret to garlic’s potency lies in a sulfur-containing compound called allicin. Allicin is released only when the garlic bulb is crushed, chopped, or bruised.

Numerous clinical studies suggest that allicin and its derivative compounds help relax smooth muscle tissue in blood vessels, which naturally supports healthy blood pressure levels already within a normal range. Furthermore, garlic exhibits strong antimicrobial and immune-supporting characteristics, making it an ideal ingredient for overall vitality.

2. Ginger (Zingiber officinale): The Anti-Inflammatory Root
With its fiery flavor and warming properties, ginger has been a cornerstone of Ayurvedic and Traditional Chinese Medicine for millennia. The primary bioactive compound in ginger is gingerol, a substance with powerful anti-inflammatory and antioxidant effects.

Systemic inflammation is often a root cause of everyday muscle soreness, joint stiffness, and physical fatigue. By neutralizing free radicals and inhibiting inflammatory pathways in the body, ginger helps soothe physical discomfort from the inside out, while simultaneously promoting healthy, efficient digestion.

3. Lime and Mint: The Vitamin C and Digestive Boosters
Fresh lime slices add a vibrant dose of Vitamin C (ascorbic acid) to the infusion. Vitamin C is a critical nutrient for collagen synthesis, meaning it directly supports the structural integrity of your skin, blood vessels, and connective tissues. The citric acid also acts as a natural preservative for the tonic.

Meanwhile, fresh mint leaves introduce menthol, which relaxes the muscles of the digestive tract, reduces bloating, and cuts through the intense sharpness of the raw garlic and ginger, resulting in a crisp, balanced, and incredibly refreshing flavor profile.

How to Make the Ultimate Garlic, Ginger, and Lime Wellness Infusion
Creating this tonic at home is incredibly straightforward, but a few specific preparation techniques will ensure you extract the maximum amount of beneficial compounds from the raw ingredients.

Ingredients You Will Need
1 whole bulb of fresh garlic, peeled

1 large piece of fresh ginger root (about 3 to 4 inches long)

2 organic limes, thoroughly washed and sliced into rounds

1 large bunch of fresh mint leaves

10 to 12 whole cloves

4 cups of filtered water (or enough to fill your glass container)

Step-by-Step Preparation Method


For Complete Cooking STEPS Please Head On Over To Next Page Or Open button (>) and don’t forget to SHARE with your Facebook friends

Read more

Why Your Pork Chops Keep Turning Out Dry — And How To Finally Fix Them

There’s something weirdly frustrating about pork chops.

They look simple. They’re sold everywhere, usually affordable, and honestly? They should be one of the easiest dinners to pull off on a busy weeknight. Yet somehow, so many pork chops end up tasting like cardboard with grill marks. Dry in the middle. Tough around the edges. A little sad.

And the worst part is that most people think that’s just how pork chops are supposed to be.

They’re not.

A good pork chop should be juicy, savory, deeply flavorful, and tender enough that you don’t need a steak knife and a prayer to get through dinner. When cooked properly, pork has this rich, almost buttery quality that people forget exists because they’ve spent years overcooking it.

Honestly, pork chops have been misunderstood for decades.

And a lot of it comes down to old habits that never really left American Kitchens.

Pork Got Stuck With A Weird Reputation
For years, pork was marketed as “The Other White Meat.” You probably remember the slogan. The campaign worked — maybe a little too well.

People started treating pork like Chicken breast. Lean, pale, cooked until absolutely no pink remained anywhere. That mindset quietly trained generations of home cooks to overcook pork by default.

The thing is, pork isn’t Chicken. It never was.

Good pork has richness. It has fat. It has character. And unlike chicken breast, pork actually tastes incredible with just a hint of blush in the center.

The USDA now recommends cooking pork to 145°F followed by a short rest period. That’s safe. Completely safe. And yes, the middle may still look slightly pink.

That tiny bit of pink? That’s usually where the magic lives.

The Fear Of Pink Pork Runs Deep
Let me explain.

A lot of people grew up hearing horror stories about undercooked pork and trichinosis. Back in the day, those concerns were legitimate. Pork production standards were different decades ago, and people were taught to cook pork until it was thoroughly gray all the way through.

For Complete Cooking STEPS Please Head On Over To Next Page Or Open button (>) and don’t forget to SHARE with your Facebook friends

Read more