Step-by-Step Instructions
1. Activate the Yeast
In a small bowl, combine the warm water, warm milk, sugar, and yeast. Stir gently and allow the mixture to sit for 5–10 minutes. During this time, the yeast will activate and begin to foam. This step ensures that the yeast is alive and ready to help the dough rise.
2. Prepare the Dough
In a large mixing bowl, combine the flour and salt. Create a small well in the center and pour in the yeast mixture, melted butter, and the egg.
Mix the ingredients together until a soft dough forms.
3. Knead the Dough
Transfer the dough to a lightly floured surface and knead for 8–10 minutes until it becomes smooth, soft, and elastic. Proper kneading develops the gluten structure, which helps the rolls rise and gives them their fluffy texture.
4. First Rise
Place the kneaded dough into a lightly greased bowl. Cover it with a clean kitchen towel or plastic wrap and allow it to rise in a warm place for 1 to 1½ hours, or until the dough doubles in size.
This resting period allows the yeast to ferment and create air pockets that make the bread light and airy.
5. Shape the Rolls
Once the dough has risen, gently punch it down to release excess air. Divide the dough into 12 equal portions.
Roll each portion into a smooth ball by tucking the edges underneath and shaping it with your hands.
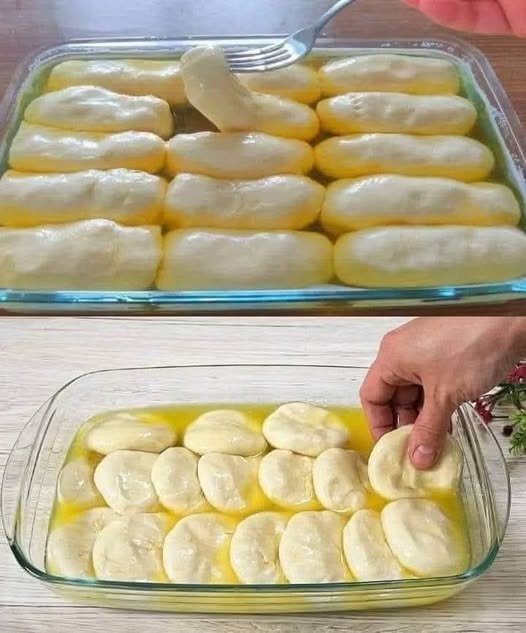
Place the shaped dough balls onto a baking sheet lined with parchment paper, leaving some space between each roll.
6. Second Rise
Cover the rolls again and let them rise for 30–45 minutes. During this time, they will become slightly larger and puffier, which helps create their soft, fluffy texture after baking.
7. Prepare for Baking
Preheat your oven to 180°C (350°F).
In a small bowl, whisk together the egg yolk and milk. Gently brush this mixture over the tops of the rolls to give them a shiny golden finish.
If desired, sprinkle sesame seeds or nigella seeds over the tops for extra flavor and visual appeal.
8. Bake the Rolls
Bake the rolls in the preheated oven for 18–22 minutes, or until they are beautifully golden brown.
Once baked, remove them from the oven and allow them to cool slightly before serving.
Tips for Perfect Soft Rolls
Brush with Butter After Baking
For extra softness and flavor, brush the warm rolls lightly with melted butter right after they come out of the oven.
Use Warm, Not Hot Liquids
Milk and water should be warm but not hot, as excessive heat can kill the yeast and prevent the dough from rising.
Knead Until Smooth
Proper kneading ensures the dough becomes elastic and smooth, which leads to lighter rolls.
Avoid Over-Kneading
Once the dough becomes smooth and elastic, stop kneading to maintain tenderness.
Allow Proper Rising Time
Rushing the rise can result in dense rolls. Give the dough enough time to double in size.
Delicious Variations
These versatile rolls can easily be customized with different fillings or flavors.
Cheese-Filled Rolls
Add small cubes of mozzarella or feta cheese in the center before shaping the dough balls.
Sweet Breakfast Rolls
Fill with chocolate chips, Nutella, or fruit jam for a dessert-style roll.
Herb and Garlic Rolls
Mix chopped herbs and a bit of garlic powder into the dough for a savory twist.
Creamy Variation
For a richer dough, replace a portion of the milk with yogurt or cream.
Serving Ideas
These Turkish-style rolls taste amazing in many different ways:
Spread with butter and honey for breakfast
Served with jam, marmalade, or Nutella
Paired with cheese and olives for a Mediterranean-style breakfast
Used as soft sandwich buns
Served alongside soups or stews
Their light texture and mild sweetness make them suitable for both sweet and savory dishes.
Storage and Reheating
Room Temperature
Store the rolls in an airtight container for up to 2 days.
Refrigeration
They can be kept in the refrigerator for up to 4 days.
Freezing
Freeze baked rolls for up to 2 months. Simply thaw and warm in the oven before serving.
Reheating
Warm the rolls in a 300°F (150°C) oven for about 5–7 minutes to restore their soft texture.
Final Thoughts
Soft Turkish-style yeast rolls are a wonderful example of how simple ingredients can create something truly special. Their fluffy interior, buttery flavor, and delicate sweetness make them perfect for almost any occasion, from relaxed breakfasts to elegant brunch spreads.
Baking these rolls at home is not only rewarding but also fills your kitchen with the comforting aroma of fresh bread. Once you experience their soft, melt-in-your-mouth texture, they may quickly become a regular favorite in your baking routine.
Whether enjoyed plain, filled with delicious ingredients, or paired with your favorite spreads, these homemade rolls bring warmth, comfort, and a touch of bakery magic to your table.
If you’d like, I can also help you create:
• a 2,500-word SEO food blog article for this recipe
• a Pinterest viral recipe format
• a short Facebook recipe post that gets high engagement.